Creating high-quality videos efficiently is important in today’s fast-paced digital world. Whether you’re a seasoned videographer or just starting, streamlining your video production workflow can save you time, money, and stress. This article will guide you from initial concept to final creation, offering practical tips and strategies to elevate your video production workload.
First, we’ll cover the essentials of pre-production planning. You’ll learn how to develop compelling concepts, write effective scripts, and create detailed storyboards. We’ll discuss budgeting, resource allocation, and managing your schedule to keep everything on track.
Next, we’ll dive into the production phase. Discover how to assemble the right team, choose the best equipment, and master lighting and sound. Practical advice on directing and managing shoots will help you get the most out of your production days.
The post-production process is where your project really comes to life. We’ll explore efficient editing workflows, adding visual effects, and refining sound design. Learn how to apply color correction, incorporate graphics, and polish your final product.
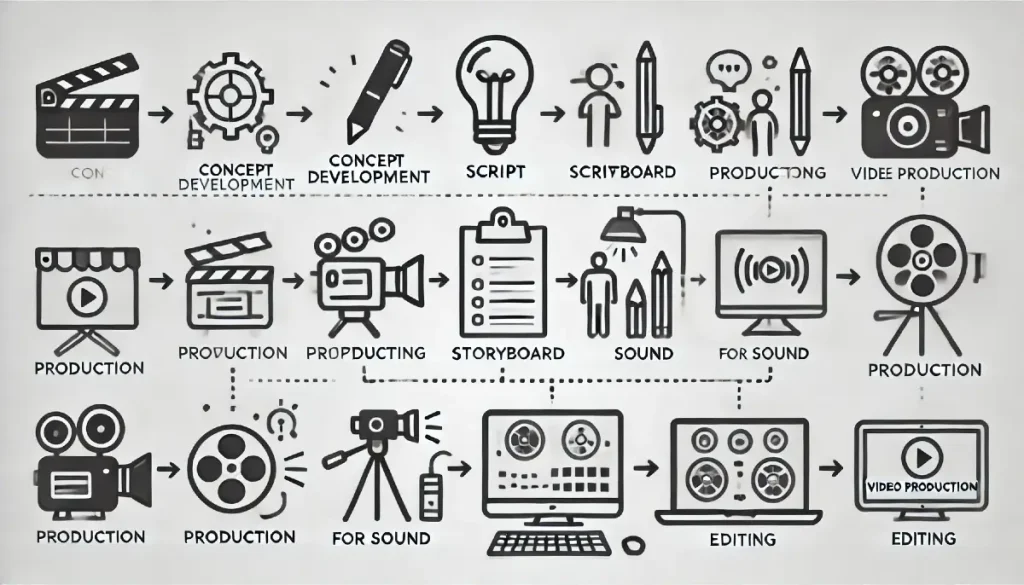
Pre-Production Planning
Concept Development
Start your video project with a strong concept. A clear and engaging idea forms the backbone of your video. Brainstorm multiple concepts. Consider your target audience and the message you want to convey. Think about what makes your idea unique and how it will stand out.
Research similar videos to see what’s been done and find inspiration. Use mind mapping to organize your thoughts and explore different angles. Keep your concept simple but impactful. Once you have a solid idea, move on to scripting.
Scriptwriting Techniques
A well-written script is essential. It guides the entire production process. Start with an outline. Break down your concept into key points and scenes. Write a draft focusing on your main message.
Use clear and concise language. Avoid jargon unless necessary. Write dialogue that sounds natural and fits your characters. Keep your script short and engaging to maintain viewer interest.
Revise your script multiple times. Read it out loud to catch awkward phrasing. Get feedback from others. Refine it until it flows smoothly and effectively communicates your message.
Storyboarding Essentials
Storyboarding visualizes your script. It helps you plan each scene and shot. Start with basic sketches. Don’t worry about artistic quality; focus on composition and shot angles.
Detail the sequence of events. Note camera movements, transitions, and key actions. Storyboards help you identify potential issues early, saving time during production.
Use digital tools like Storyboard That or traditional paper methods. Share your storyboards with your team to ensure everyone understands the vision. Adjust as needed based on feedback.
Budgeting and Resource Allocation
Budgeting is crucial. It ensures you have the resources needed without overspending. Start by listing all potential expenses: equipment, locations, talent, crew, and post-production.
Create a detailed budget plan. Allocate funds based on priorities. Keep a buffer for unexpected costs. Track expenses carefully throughout the project to stay within budget.
Resource allocation involves assigning the right people and equipment to each task. Assess your team’s strengths and assign roles accordingly. Ensure everyone has what they need to perform efficiently.
Scheduling and Timeline Management
A solid schedule keeps your project on track. Begin by outlining all tasks from pre-production to post-production. Estimate the time needed for each task.
Create a timeline with specific deadlines. Use project management tools like Trello or Asana to organize tasks and track progress. Assign responsibilities and set milestones.
Regularly review and adjust your schedule as needed. Communicate changes clearly to your team. Efficient scheduling and timeline management can significantly boost your workload efficiency, helping you meet deadlines and avoid last-minute rushes.
By focusing on these key areas in pre-production planning, you set a strong foundation for your video project. This meticulous planning stage ensures a smoother production and post-production process, ultimately leading to a higher-quality final product.
Setting Up Your Production Team
Building a strong production team is crucial for any successful video project. Start by identifying the key roles you need. Typically, you’ll want a director, camera operators, sound technicians, lighting experts, and production assistants. Make sure each team member understands their responsibilities. Clear communication is vital to avoid confusion during shoots.
Hiring experienced professionals can significantly boost your workload efficiency. Look for individuals with proven track records in their respective fields. Use freelance platforms, professional networks, and industry events to find the best talent. Remember, a well-coordinated team can save you time and ensure high-quality results.
Choosing the Right Equipment
The right equipment can make or break your video production. Start with a good camera. Whether it’s a DSLR, mirrorless, or professional cinema camera, choose one that suits your project needs and budget. Invest in quality lenses to enhance your footage. Prime lenses are great for sharpness, while zoom lenses offer flexibility.
Don’t forget about audio equipment. A good microphone is essential for clear sound. Lavalier mics are perfect for interviews, while shotgun mics are great for capturing ambient sounds. Use a reliable audio recorder to avoid syncing issues in post-production.
Lighting is another critical aspect. LED panels are versatile and energy-efficient. Softboxes provide diffused light, reducing harsh shadows. Make sure you have enough stands, clamps, and gels to control your lighting setup effectively.
Effective Lighting Techniques
Lighting can dramatically affect the look and feel of your video. Start with a three-point lighting setup: key light, fill light, and backlight. The key light is your main source, providing the most illumination. Place it at a 45-degree angle from your subject. The fill light softens shadows created by the key light. Place it opposite the key light. The backlight adds depth, separating the subject from the background.
Natural light is also a valuable resource. Shooting during golden hour, the period shortly after sunrise or before sunset, provides soft, warm light. Use reflectors to bounce natural light and fill shadows.
Experiment with different lighting setups to find what works best for your scene. Consistency is key. Match your lighting style to the mood you want to convey, and always monitor how it affects the overall shot composition.
Sound and Audio Considerations
Great visuals need great audio to match. Start with quiet locations to minimize background noise. Use directional microphones to capture clean sound. If you’re shooting outdoors, consider windshields for your mics.
Monitor audio levels throughout the shoot. Clipping can ruin a take, and low levels can lead to unwanted noise. Use headphones to catch any issues early.
Room tone is important. Record a few minutes of ambient sound in each location. This helps smooth out transitions and mask edits in post-production.
Always have backup audio. Use a secondary recorder or another mic setup. Redundancy can save you if something goes wrong.
Directing and Managing Shoots
Directing requires a mix of creativity and management. Start by briefing your team on the day’s goals. Clear communication ensures everyone knows what’s expected.
During the shoot, maintain a positive atmosphere. Encourage collaboration and creativity. Keep an eye on the schedule, but stay flexible for creative opportunities.
Watch the monitor closely. Look for framing, focus, and performance issues. Don’t be afraid to do multiple takes to get the perfect shot.
After each major setup, review the footage. This can save you from discovering issues later in post-production.
Efficient management and strong direction will boost your workload, making the production phase smoother and more productive.
Project Management and Collaboration
Using Project Management Tools
Efficient project management is key to smooth video production. Tools like Trello, Asana, and Monday.com can help you keep track of tasks, deadlines, and team responsibilities. Use these platforms to create a visual roadmap of your project. Assign tasks, set deadlines, and monitor progress. Automation features can send reminders to team members, ensuring nothing falls through the cracks. Integrate these tools with your calendar to sync schedules and avoid conflicts.
Effective Communication with Team Members
Clear communication is crucial for any successful project. Use collaboration AI tools like Slack, Microsoft Teams, or Zoom to facilitate real-time discussions and updates. Regular check-ins can keep everyone on the same page. Share updates, ask questions, and provide feedback promptly. Utilize video calls for more detailed discussions and brainstorming sessions. Effective communication minimizes misunderstandings and keeps the workflow smooth.
Reviewing and Approving Edits
Streamline the review process by setting up a clear approval workflow. Use platforms like Frame.io or Wipster to allow team members and clients to view and comment on edits directly. These tools support time-stamped comments, making it easier to address specific parts of the video. Establish deadlines for feedback to keep the project moving forward. Prioritize critical edits to maintain the production schedule.
Client Feedback and Revisions
Client feedback is a vital part of the production process. Encourage detailed feedback by providing clients with easy-to-use review tools. Explain how they can make comments and suggest changes. Be proactive in addressing their concerns. Use feedback management systems to track revisions and ensure all client requests are met. Effective handling of client feedback can improve satisfaction and foster long-term relationships.
Archiving and Organizing Finished Projects
Once a project is completed, proper archiving is essential. Store all files, including raw footage, edits, and final versions, in an organized manner. Use cloud storage solutions like Google Drive, Dropbox, or dedicated media management platforms. Label files clearly with dates and project names for easy retrieval. Regularly back up your data to prevent loss. An organized archive system saves time when you need to revisit or repurpose content.
By mastering these aspects of project management and collaboration, you can enhance your video production process, making it more efficient and productive. Embrace technology, leverage collaboration AI, and maintain clear communication to ensure your projects run smoothly from start to finish.
Conclusion
Wrapping up your video production efficiently is entirely possible with the right approach. By focusing on thorough pre-production planning, you’ll set a solid foundation. Remember, a detailed storyboard and well-thought-out script can save you hours during shooting and editing.
During production, the key is to use the right equipment and techniques. Don’t underestimate the importance of good lighting and sound—they can make or break your video. Assembling a capable team ensures smooth shoots and high-quality footage.